
Almost a year ago, I wrote an article about cloning VMWare VMs via vSphere client GUI and actually this is one of the most viewed posts in my blog. This method had the disadvantage of keeping the vm filenames the same. Let’s see an official way of cloning VMWare vms using vmkfstools command. Of course this method works with the free edition of ESXi 5.5 as well. I will show the procedure by cloning a snapshot of a vm since this is a little more tricky than cloning just a single vm.
First let’s make a snapshot of my Xp3 vm. Right click the vm and make a snapshot, let’s call it “mySnapshot”. Of course you don’t need to do this if you just want to clone a single vm. After that, shutdown the vm otherwise the files will be locked.
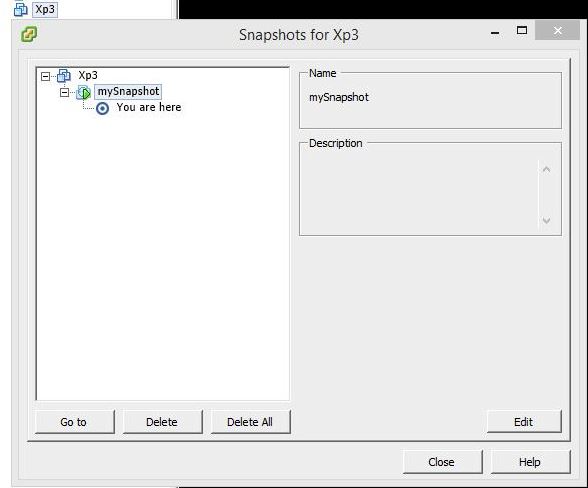
vm snapshot
Now enable the ssh service on your ESXi by going to the configuration tab and the security policy option. Just start it for the moment, you don’t need to set it to start automatically. Use a ssh client like putty and connect to the hypervisor. Browse the folder under /vmfs/volumes path. It should look like this
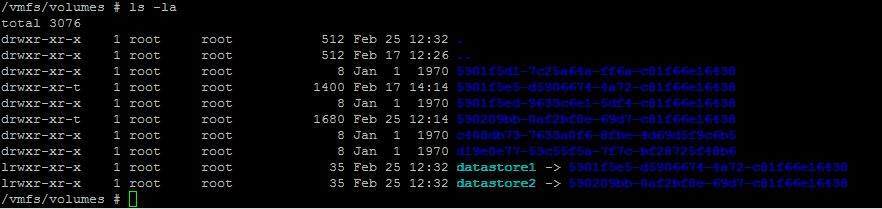
datastores
so type
cd /vmfs/volumes
ls -la
in my case I have two datastores and my Xp3 vm is in datastore2, so let’s get into it.

Xp3 vm and snapshot
cd datastore2
ls -la
As you can see now, there are more than one vmdk disk files, the flat vmdk, the delta vmdk and the vmdk descriptor file (the Xp3-000001.vmdk file in our example), along with the memory snapshot and various control and log files. What we should use here as a source file is the descriptor file that points to our snapshot. If you didn’t have a snapshot, the source file would be the vmdk descriptor file of your vm, Xp3.vmdk.
Now, what I need to do is clone my Xp3 snapshot to a new Xp4 vm. First create the destination folder in datastore2 folder and type in the following commands
mkdir Xp4
and clone the disk file
vmkfstools -i /vmfs/volumes/datastore2/Xp3/Xp3-000001.vmdk /vmfs/volumes/datastore2/Xp4/Xp4.vmdk -d thin
if it was a single vm without a snapshot, you should run
vmkfstools -i /vmfs/volumes/datastore2/Xp3/Xp3.vmdk /vmfs/volumes/datastore2/Xp4/Xp4.vmdk -d thin
if you list the files in the destination folder you will see the new flat file and the descriptor file.
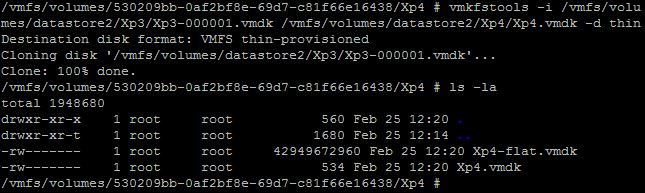
cloned disk files
The actual syntax of vmkfstools command is
vmkfstools -i source_path destination_path -d disk_format -a adapter_type
type man vmkfstools for more on this command
Finally create a new vm and force the use of an existing disk file.

create new vm

use existing virtual disk

select the cloned vmdk
You are ready to power it on.
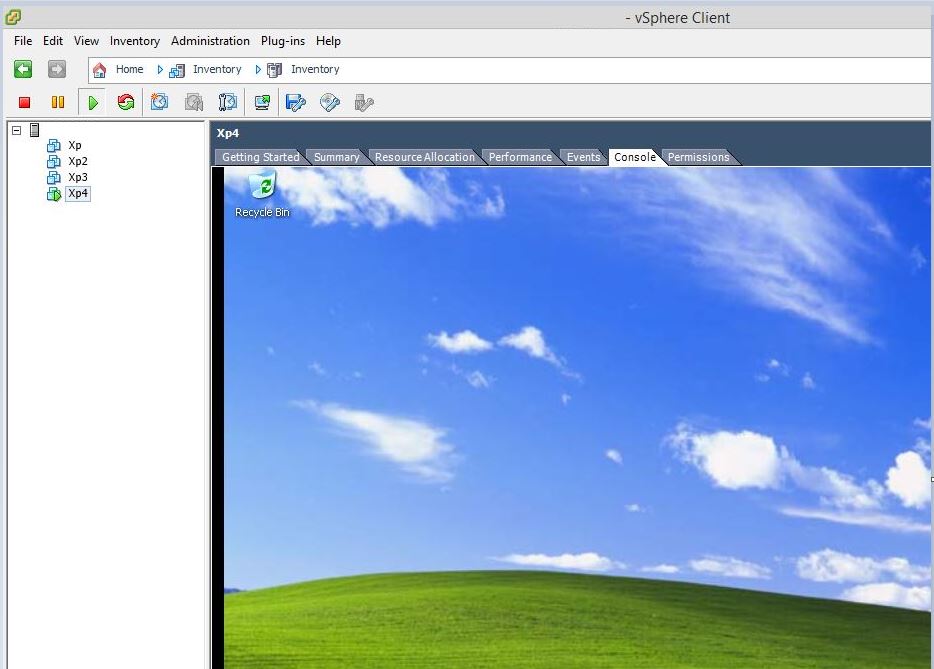
power on
if you list the folder of the cloned vm you will see something like that

cloned vm files
Don’t forget to use sysprep command in windows to generalize your new virtual machine. More on this at the end of my previous article.
Reference: VMWare’s website article

Hey thanks a lot for this great article.
Helped me out.
thanks ….so much
Good article to the point thanks!
Hi,
Thanks a lot.
Very usefull instruction described here.
Pingback: Cloning Virtual Machines: The Advantage for Home Labs | Ben Seitz III
Pingback: Cloning VM’s in Hyper-V | Ben Seitz III
I recently migrated from Parallels Cloud Server to VMWare ESXI and I was having the hardest time figuring out how to get the VM Cloning to work. Your article was a huge help, thank you very much.
but data store space showing same…orignal vmdk file space 110 GB same also showing in data store (right click datastore and brows datastore)…after cloning vmdk file space is only 14 GB.
It seems that you have a lot of available free space on your source disk. The -d thin flag on the vmkfstools command declares the new drive to be of thin type. Small file first that it grows along with the disk usage, it has a small impact on disk performance!
I think this vmkfstools command only suports up to version 8 VMs?
It worked but did not support the Ubuntu Desktop, that I was trying to clone.
But if you clone via the vCenter Converter (free) and point to the same machine to convert from Esxi to Esxi, it will simply clone for you, version 10 VM and that’s working much
better for me with Ubuntu Desktop 14.04 VMs..
https://my.vmware.com/web/vmware/info/slug/infrastructure_operations_management/vmware_vcenter_converter_standalone/5_5
You are right! Thanks for the comment!
I have an issue with the command. It says it can’t open the file because it can’t lock it.
# vmkfstools -i /vmfs/volumes/SSDMini/YosSrvVM/YosSrvVM-000001.vmdk -d thin
/vmfs/volumes/ReadyNAS-NFSShare/BackupVMs/YosSrvVM-backup/YosSrvVM-backup.vmdk
Failed to open ‘/vmfs/volumes/SSDMini/YosSrvVM/YosSrvVM-000001.vmdk’: Failed to lock the file (16392).
I checked, the snapshot file is not locked :
# vmkfstools -D /vmfs/volumes/SSDMini/YosSrvVM/YosSrvVM-000001.vmdk
Lock [type 10c00001 offset 180451328 v 1308, hb offset 3153920
gen 183, mode 0, owner 00000000-00000000-0000-000000000000 mtime 22746
num 0 gblnum 0 gblgen 0 gblbrk 0]
Addr , gen 1296, links 1, type reg, flags 0, uid 0, gid 0, mode 600
len 320, nb 0 tbz 0, cow 0, newSinceEpoch 0, zla 4305, bs 8192
/vmfs/volumes/54575f35-e5e43590-241f-3c075465b1dd/YosSrvVM # lsof |grep YosSrvVM-000001
35316 vmx FILE 52 /vmfs/volumes/54575f35-e5e43590-241f-3c075465b1dd/YosSrvVM/YosSrvVM-000001-delta.vmdk
35316 vmx FILE 127 /vmfs/devices/deltadisks/7483af8b-YosSrvVM-000001-delta.vmdk
The only locked file is the delta that i’m not trying to use.
The vm is powered down. Right?
No, it is not, but i thought the goal of using a snapshot was to be able to clone the VM without powering it off ?
The VM should lock only the delta vmdk, (and we see with lsof that it is what it does) the snapshot file should be used read-only, shouldn’t he ?
But the master file should be locked as well since it is being used (read only) by the vm along with the delta vmdk (read/write). You can use vmware vcenter converter standalone client to clone a running vm.
Reblogged this on Imran's Tech Tips and commented:
I was trying to clone a VM and came across this excellent guide by Nikos.
Cloning went OK, apparently, but when I try to select the cloned vdmk while creating a new VM, no files are displayed in the Open File window. All the while I can see the files in the folder with ssh plain as day. All settings (#CPUs, RAM etc. are identical to the original VM). Any ideas what I could try next?
Here is the clone command log:
_____________________________________________________________
/vmfs/volumes/54984c0b-f25ba1ac-e809-b083fee1ee62 # vmkfstools -i /vmfs/volumes/54984c0b-f25ba1ac-e809-b083fee
1ee62/SNTest1/SNTest1-000002.vmdk /vmfs/volumes/54984c0b-f25ba1ac-e809-b083fee1ee62/Common2008R2/Common2008R2.
vdmk -d thin
Destination disk format: VMFS thin-provisioned
Cloning disk ‘/vmfs/volumes/54984c0b-f25ba1ac-e809-b083fee1ee62/SNTest1/SNTest1-000002.vmdk’…
Clone: 100% done.
______________________________________________________________
Hi, check the spelling on the destination path… It is vmdk…
Thank you for your eagle-eyed correction. I feel stupid…
After renaming the file, everything worked as expected.
scripted this, to hotclone a VM, see
https://communities.vmware.com/message/2470141?tstart=0#2470141
Why you need to take a snapshot. if we simply clone VM and then I believe we do not need snapshot right? I believe this will cover VM with more than one VM disk files.
Pingback: Cloning a Linux VM in ESXi - <Code />
I cloned a CentOS 6.6 machine. Everything was fine up to the point when I started the cloned machine. I got a mount error that the file system type must be specified and then kernel panic and she freezes there.
I haven’t try centos cloning. Do you clone the vm on the same ESXi host?
Yes, on the same host, no snapshot but followed the directions above for no snapshot. The guest machine seems to get past BIOS, displays the blue and white progress line at the bottom of the screen, so I am thinking that it seems to be reading from the virtual drive. When it gets to the point of mounting volumes is when it displays the error that the file type must be specified. The original virtual machine that the copy came from starts normally.
Sorry, I meant to reply, not start a new thread. Disregard the new thread.
The fstab file in the working original guest shows the root file system mountpoint / is a logical volume of the type ext4.
I solved my own issue and the solution may be of interest to the folks who are trying this procedure.
I can’t remember the specific reason that I set up two virtual disks on this server but it was the cause of the cloned machine not working. After I realized that the cause was the second drive here is what I had to do to get the cloned machine running: After following the procedure above for a virtual machine without a snapshot I had to issue a second clone command vmkfstools for drive 2. After creating the machine as per the above procedure using vSphere, I added the second drive into the virtual machine and when started it ran fine.
Great!
The fstab file in the working original guest shows the root file system mountpoint / is a logical volume of the type ext4.
Sorry, didn’t mean to start a new thread. I copied this to my original thread.
Worked great! Thanks!
Hi,
I have two virtual disks on my VM. Base.vmdk and Base_1.vmdk. Do I need to run vmkfstools commands twice? Can some one please provide procedure to clone VM with more than one virtual disks.
Yes run it twice for each disk and afterwards add the second disk on the cloned vm. Finally power up the vm.
Does cloning without the snapshot is faster than with the snapshot? I am looking for ways to clone some of our VMs faster than usual.
Any suggestions what I can try to clone it faster? I am using SAS drives on my SAN Storage and all Fiber Channels Storage Arrays and no iSCSI.
Thank you,
Jay
Using Extrasphere 2.0 you can clone running VM to the same or another ESXi host (including free licensed) with or without shared storage… and it’s free.
Pingback: VMware VM klonen – Techblog